Scene Tree
Intro
The Scene Tree sits to the left of the Time/Graph Editor within the Scene Window and consists of a dual hierarchy of both parent/child Layers and animated attributes. Layers can be parented underneath one another for animation purposes and/or to organise a Composition.
Anatomy of the Scene Tree
Lock Layers
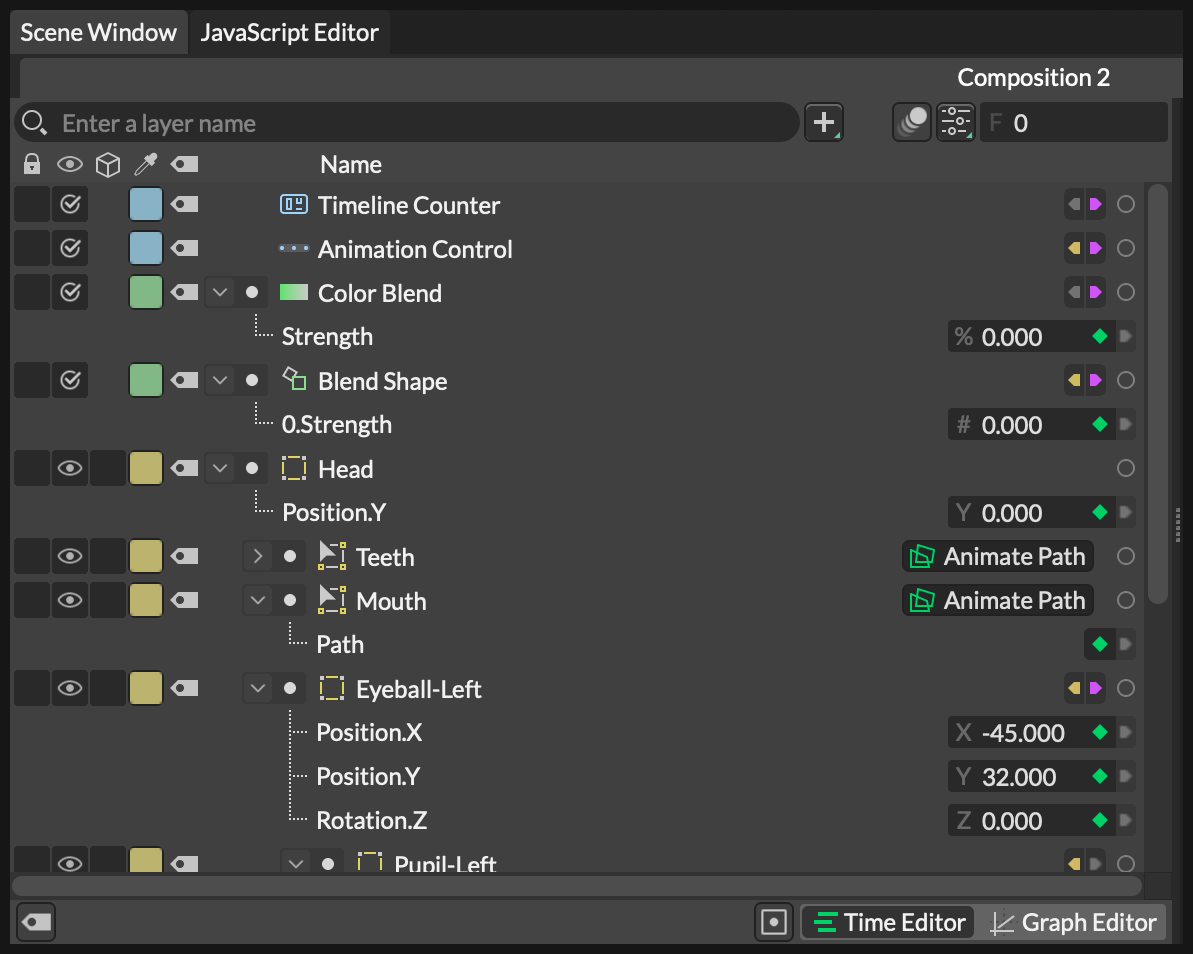
On the far left hand side of the Scene Tree there are several columns containing switches. The column to the far left contains the lock switch for each Layer. Clicking in this area for each row will show a lock icon which disables selection in the Viewport for 'drawable' Layers like Shapes, Falloffs and Nulls. This can be useful where it's important that Shapes do not get accidentally moved when selecting/moving other Shapes. Locking a Layer also prevents renaming a Layer of any type.
Hide/Disable Layers
The second column contains a switch with either an eye or a checkmark icon. For a 'drawable' Layers like Shapes, Falloffs and Nulls this will display an eye icon and clicking a row will toggle between hiding or drawing the Layer in the Viewport. For any non-drawable Layers, a checkmark icon is shown. Toggling this will enable/disable the Behaviour/Utility/Effect (i.e. stop it calculating).
A Shape which is a child of another Shape inherits its parent Shape's visibility so, where a parent's visibility is off, this will be indicated in the UI by dimming the child's eye icon (where it is set to visible).
Hidden Shapes are not rendered but, where they are connected to other Layers (e.g. as an Input Shape to a Duplicator or Outline), they will be calculated.
Every Shape also has its Hidden attribute available under the Advanced tab in the Attribute Editor. This can also be keyframed or connected to hide/show Shapes over time.
2.5D
When a Camera is included in the Composition, Shapes with this toggle enabled will be placed in a 2.5D environment.
Set label colours
The forth column contains coloured squares which can be used to give each Layer a label colour. Clicking a square will open a list of predefined colours which can be used to visually categorise Layers for organisational purposes.
Layer colours are also inherited by the Time Editor and Graph Editor.
Tags
Click the label icon to quickly assign Tags. If tags do not already exist in the Scene, they will be created.
Hierarchy
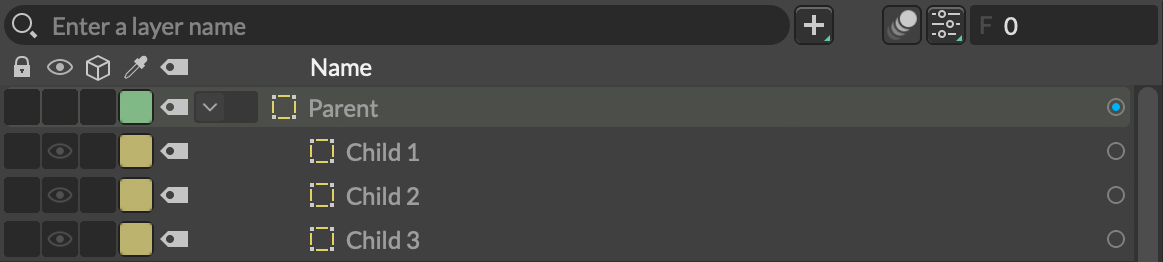
A hierarchy is a collection of related Layers arranged in a tree. Parent Layers show their children underneath them with their names and icons slightly indented to the right. Hierarchies can be many layers deep. For example, a child can be the parent to a grandchild, and so on.

Create a hierarchy
To make Layer1 a child of Layer2, click and drag on Layer1 and move it so it's over Layer2. A box should appear around Layer2 to indicate that it will become the parent to Layer1. On releasing the mouse, Layer1 will be positioned underneath Layer2 and indented to the right indicating it is now a child of Layer2.
Alternatively, click Layer1 to select it then Cmd/Ctrl + click Layer2 to add it to the selection – pressing Cmd/Ctrl + P will then make Layer2 the parent of Layer1. In the event that more than two Layers are selected, the last Layer selected will become the parent to the others.
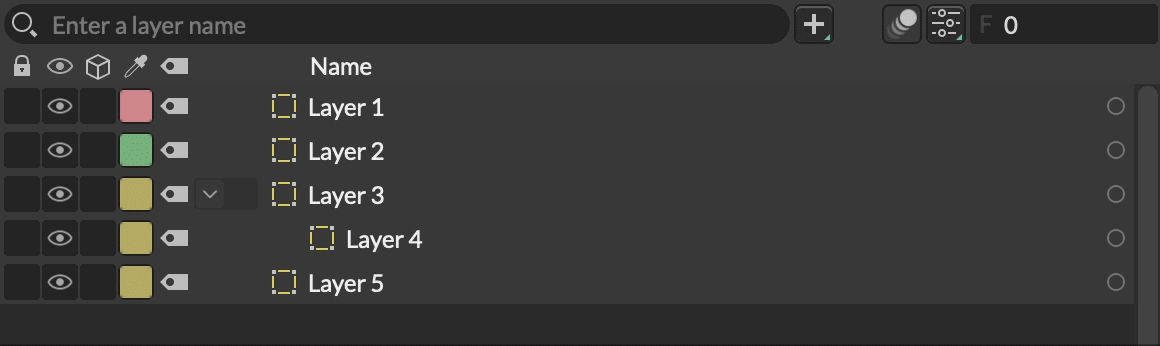
An arrow disclosure icon will appear to the left of a parent Layer's icon. This be used to expand or collapse the hierarchy which is useful for simplifying your Scene Tree display. Note that collapsing the hierarchy doesn't hide the Layers, it's purely an organisational tool.
For 'drawable' Layers like Shapes, Falloffs and Nulls a child Layer also inherits the transformations of its parent Layer. For example, when the parent is moved the child will move with it.
Where a Layer within a collapsed hierarchy is selected in the Viewport, the disclosure icon of its parent will be tinted green and a green vertical line will appear to the right of the row so it can be more easily located within the Scene Tree.
Use the Edit > Show in Scene Window command (Cmd/Ctrl + L) to scroll the Scene Tree to the Layer and expand any hierarchy it may be contained within.
Remove a Layer from a hierarchy
To unparent a Layer, drag it out of its parent hierarchy into a blank space in the Scene Tree, or between two Layers at a different level, and release the mouse.
Reorder a hierarchy
Layers can be moved up/down or in/out of hierarchies. Simply click + drag a Layer (or Layers) up or down in the list of Layers. A white line will appear in between other Layers to indicate where the Layer(s) will be positioned in the list. On releasing the mouse the Layer(s) will be repositioned within the list. Pay attention to the horizontal position of the white line. The line will indent depending on whether the gap between Layers represents the last child Layer within an expanded hierarchy or the position below the collapsed hierarchy.
Show/hide animated attributes
Layers with animated attributes show a small dot to the right of the hierarchy arrow icon. Clicking this dot will hide all the animated attributes for the Layer. This can be useful for focussing on organisation and scene hierarchy.
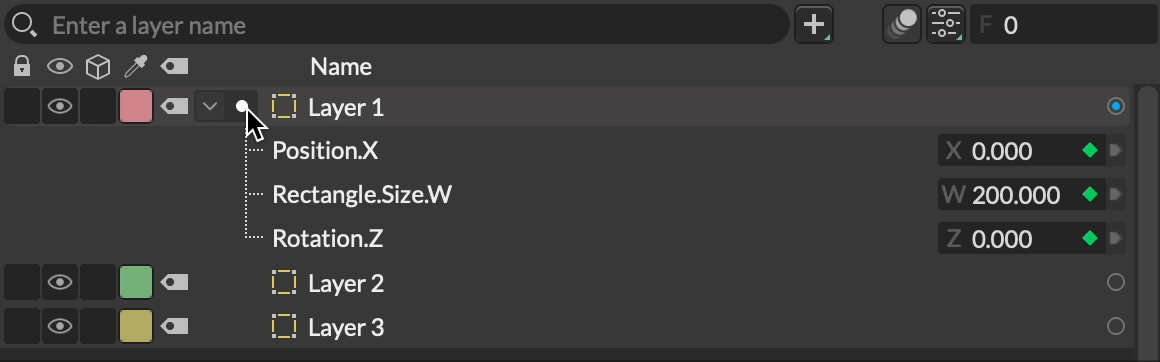
A quick way to show and hide the animation of several Layers at once is to first select them, then use the shortcut Cmd/Ctrl + Shift + H to toggle the Show/Hide Animation state. This option can also be found in the Edit menu.
Name Layers
To rename a Layer in Cavalry simply select the row in the Scene Tree and press the Return key. This will make the name editable. Once done, either press Return again or click out of the box to commit the name change. Pressing Escape will stop the editing process without committing the new name.
Multiple Layers can be renamed at the same time. Click a Layer to select it then Shift + click another Layer to add it, and any Layers between it, to the selection. Hitting Return will switch the last Layer selected to edit mode – anything typed will be applied to all the other selected layers along with a suffix (Name 1, Name 2, Name 3...).
Change Composition settings
Click on the Composition Settings button in the Scene Tree header to open the Composition Settings window.
Search
There is a search bar at the top of the Scene Window above the main hierarchy of Layers. To search simply click in this box and start typing. Layers will then be filtered by name.
Search can also be populated by dragging a Layer into the search field.
Group Layers
To group a Layer or selection of Layers, simply select a Layer(s) and then press Cmd/Ctrl + G. The selected Layer(s) will then be parented under a new Group.
Select Layers
Layers can be selected by clicking anywhere on their row. Use Cmd/Ctrl + click to add or remove Layers from an existing selection. Holding Shift when selecting a second Layer will select everything between the two.
Double clicking Layers
| Action | Result |
|---|---|
| Double click a Layer | Load the Layer's UI into the Attribute Editor. |
| Option/Alt + double click a Layer | Clear the Attribute Editor before loading the Layer's UI. |
| Option/Alt + Cmd/Ctrl + double click a Composition Layer | Open the Composition. This is the equivalent of clicking the Open button on the Composition Layer's row. |
Animation Offsets
Connections can be made to layer additional animation on top of any existing keyframe animation. For example, a Noise Behaviour can be added to some linear animation to give the movement a more natural feel. When picking up a connection from a Layer, an additional input will appear on the row of any Layer with keyframe animation. Drop the connection on this input to create the Animation Offset.

When previewing a Layer with a connected Animation Offset in the Graph Editor, the original animation curve will appear ghosted.
UI
Header
Search - Filter the contents of the Scene Window based on search results.
Quick Add - Access a pop up version of the Quick Add window to add Layers to a Composition. Use the Cmd/Ctrl + . shortcut.
Motion Blur - Enable Motion Blur for the Composition.
Composition Settings - Open the Composition Settings window.
Frame/Timecode display - Set the current frame for the playhead by either entering a value or scrubbing the control. Toggle between a frame or timecode display by Option/Alt clicking the input.
Footer
Tags - Open/close the Tags drawer.
Animation Layer Filter - Filter the Scene Tree to only show selected layers and their animated attributes. The following hotkeys can be used:
| Hotkey | Result |
|---|---|
| U | Any selected layers are filtered and, if any animated attributes are hidden, they are revealed. If there is no selection the entire scene is filtered. |
| Option/Alt + U | Any selected layers are filtered including any children with any animated attributes and, if any animated attributes are hidden, they are revealed. |
| Shift + Option/Alt + U | Any selected layers are filtered including any children and, if any animated attributes are hidden, they are revealed. |
Time Editor/Graph Editor switch - Use this to switch between the Time Editor and Graph Editor.